CorSense®

Getting Started Guide

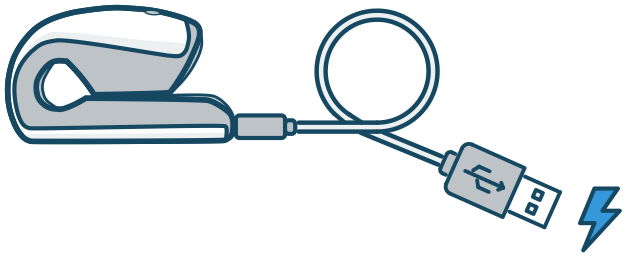
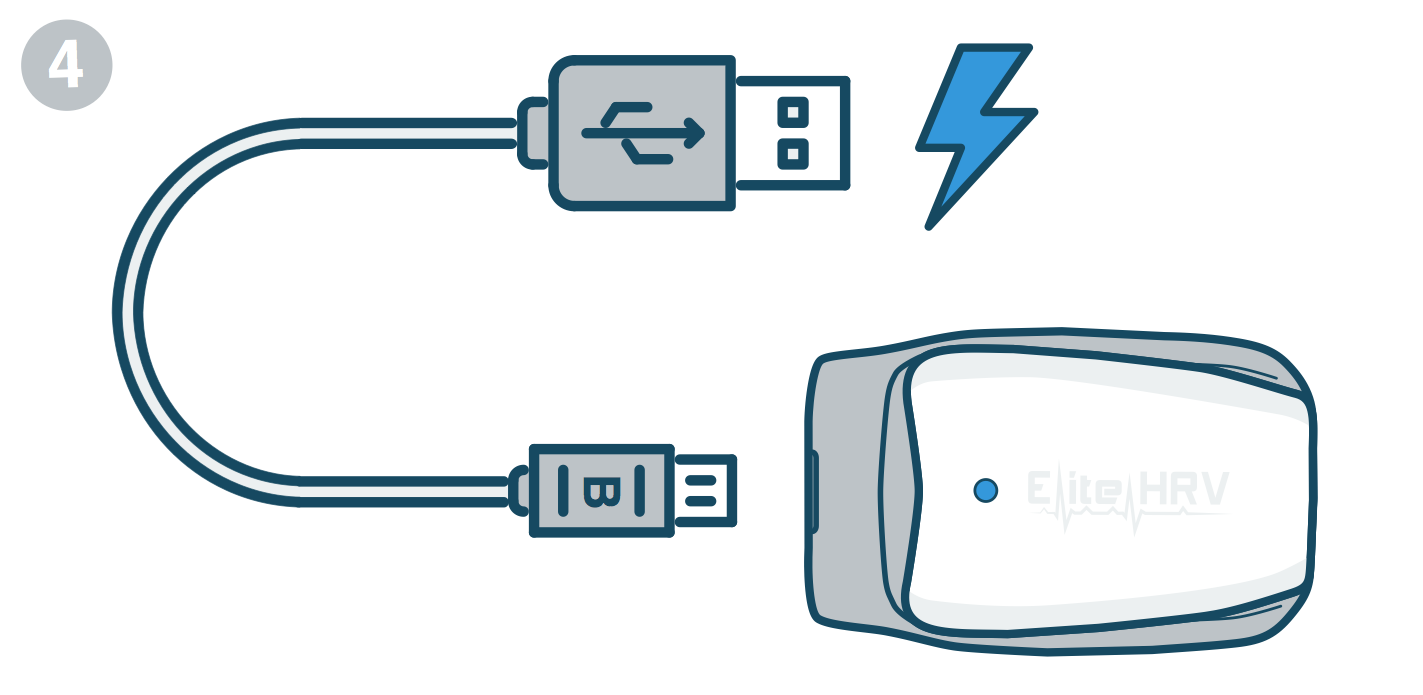
1. Locate supplied USB cable and activate the CorSense by plugging it in to a power source. Once the top LED light is solid blue, the CorSense is activated and fully charged.

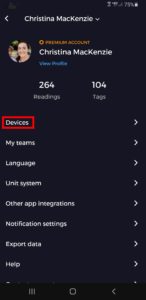
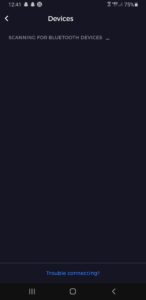
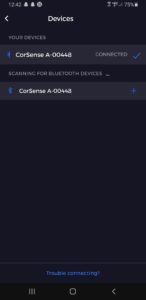
2. Next, navigate to the Devices screen inside the "Settings" menu found by tapping your profile picture or the blue icon in the top right corner and connect:


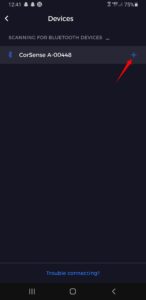
3. Do not pair the CorSense to your phone's Bluetooth settings. Only pair it in the Elite HRV app.

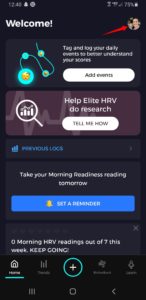
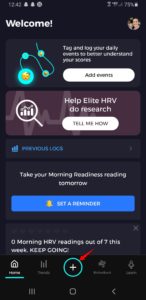
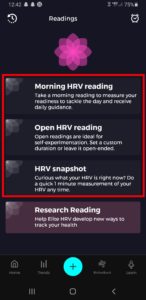
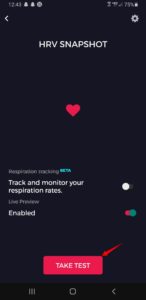
4. Navigate back to the home screen to select the reading menu to take an HRV reading:


Pro Tips for using CorSense

  • Before your reading, connect CorSense in the Elite HRV app and NOT via your phone’s Bluetooth settings.  See more >
  • For the best signal, make sure your finger is positioned correctly on the sensor window.  See more >
  • If you have weaker circulation or cold hands, warm them up and take a few deep breaths to help CorSense find your pulse.
  • After you have connected CorSense and started your reading, keep your hand very still (on your lap, or table) while CorSense calibrates your pulse.

ENGLISH      FRANÇOIS      DEUTSCH      ITALIANO      ESPAÑOL      PORTUGUÊS      SVENSKA

ACTIVATE & CHARGE SENSOR


DOWNLOAD & SETUP APP

PAIR SENSOR & START MEASURING!


Thanks for choosing CorSense by Elite HRV! This guide will walk you through the basics of using CorSense. You can also sign in to the FREE Elite HRV mobile app to guide you.

Getting Started

  1. Your CorSense device is in standby mode when you receive it. To activate it, plug it into a powered USB outlet using the included USB charging cord.
  2. Charge your CorSense for up to 10 minutes. (A solid blue LED light will indicate it is charged and ready for use).
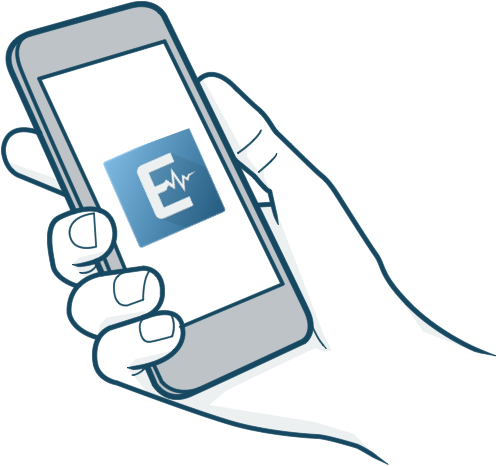
  3. Install the Elite HRV app (available for iOS and Android) on your compatible device. elitehrv.com/app
  4. Register or login to your Elite HRV account (free, secure backup for your data).

Pairing your CorSense

While CorSense can be used with any compatible HRV app, we recommend pairing it with the free Elite HRV app, following these steps:

  1. Ensure your smartphone device Bluetooth  is turned on.
  2. Open your Elite HRV app.
  3. On the home screen, select the Connect button. Alternatively, go to the More  screen and select Connect HR Monitor >.
    Once on the Connect HR Monitor screen, the app will automatically begin scanning for devices.
  4. Pick up your CorSense and check that the LED indicator light is flashing blue (this indicates that your CorSense device is turned on). Then select your CorSense HR monitor from the list of scanned devices.
  5. Your CorSense is now paired! You can remove it or rename it directly from this screen.

Note: CorSense power on will time out after 1 minute of no connectivity to a device in order to conserve battery power. If you do not see your CorSense in the list of devices because it timed out, you can select SCAN again.

Visit elitehrv.com/support to learn more about pairing your CorSense with the app (including screenshots and videos) and information on how to use the app and compatible devices.

Automatic Pulse Detection

With proper finger placement, it will take several seconds for your CorSense to automatically detect your pulse after connecting.

Wearing your CorSense

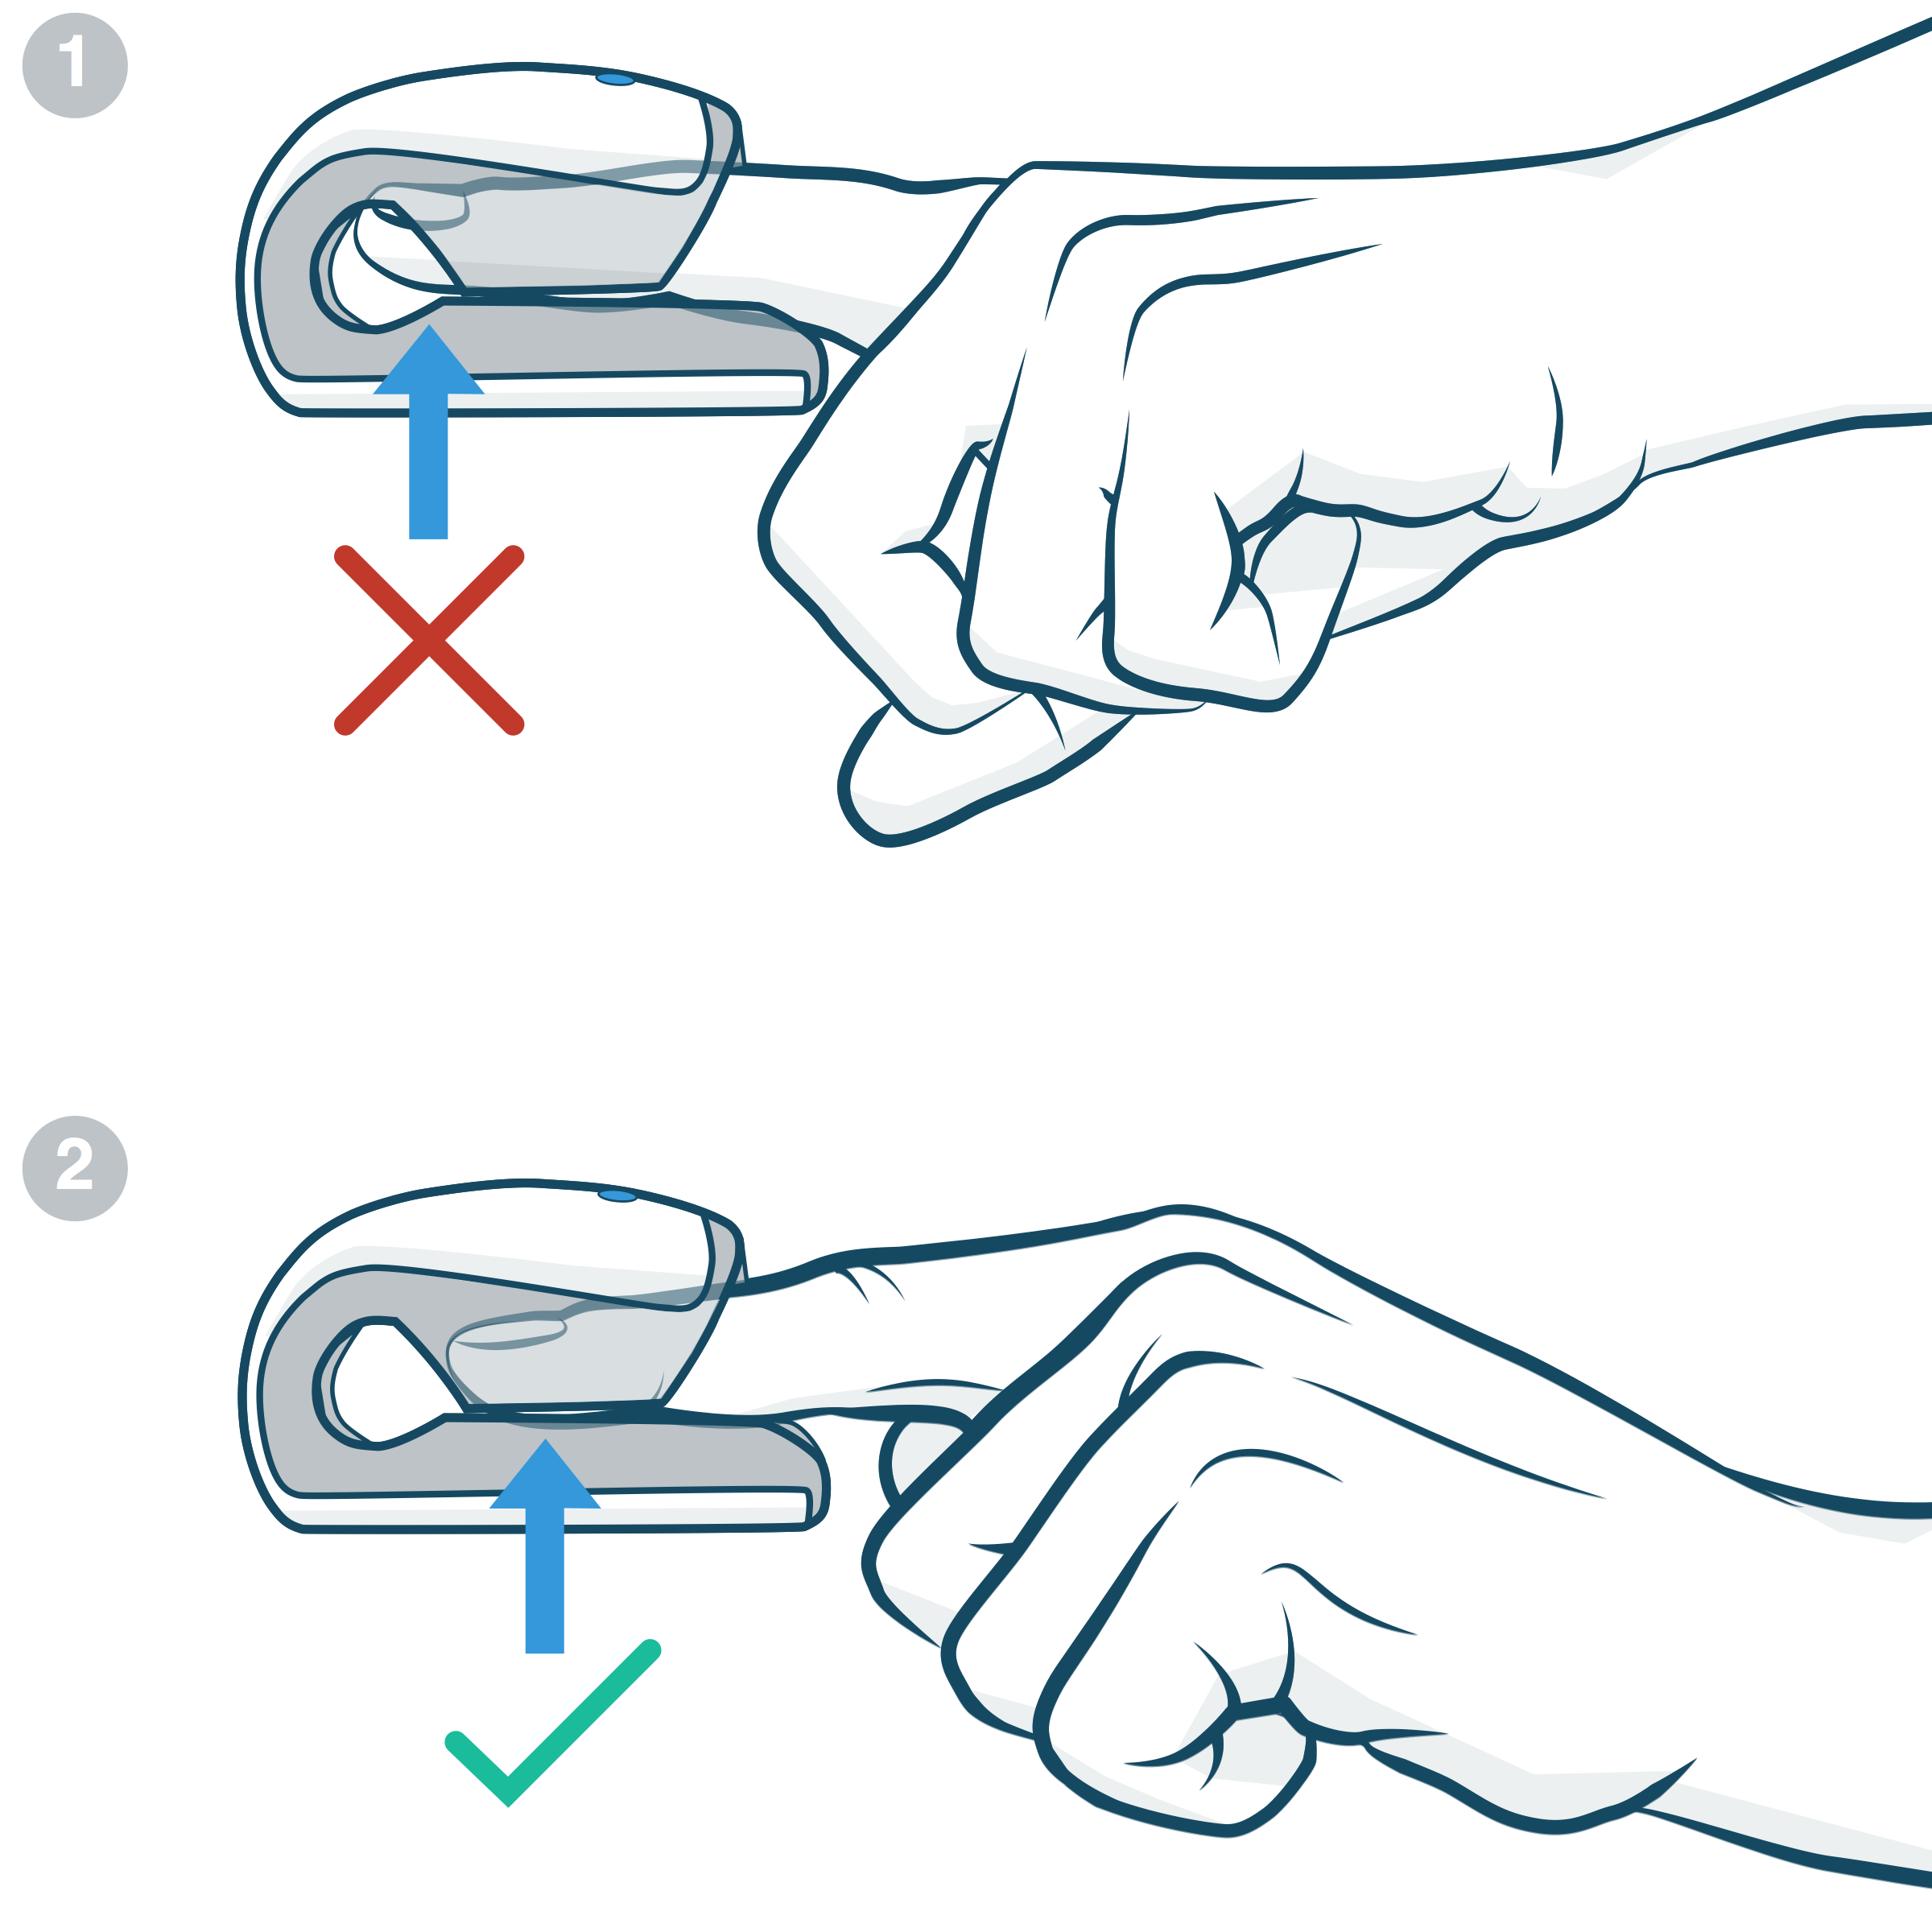
For the best signal, insert your finger and place the pad of your finger on the sensor window. When inserting your finger, stop when you feel the raised ridge behind the window (images 1, 2). Pushing your finger too far forward into the CorSense may result in a lower quality signal due to knuckle interference.

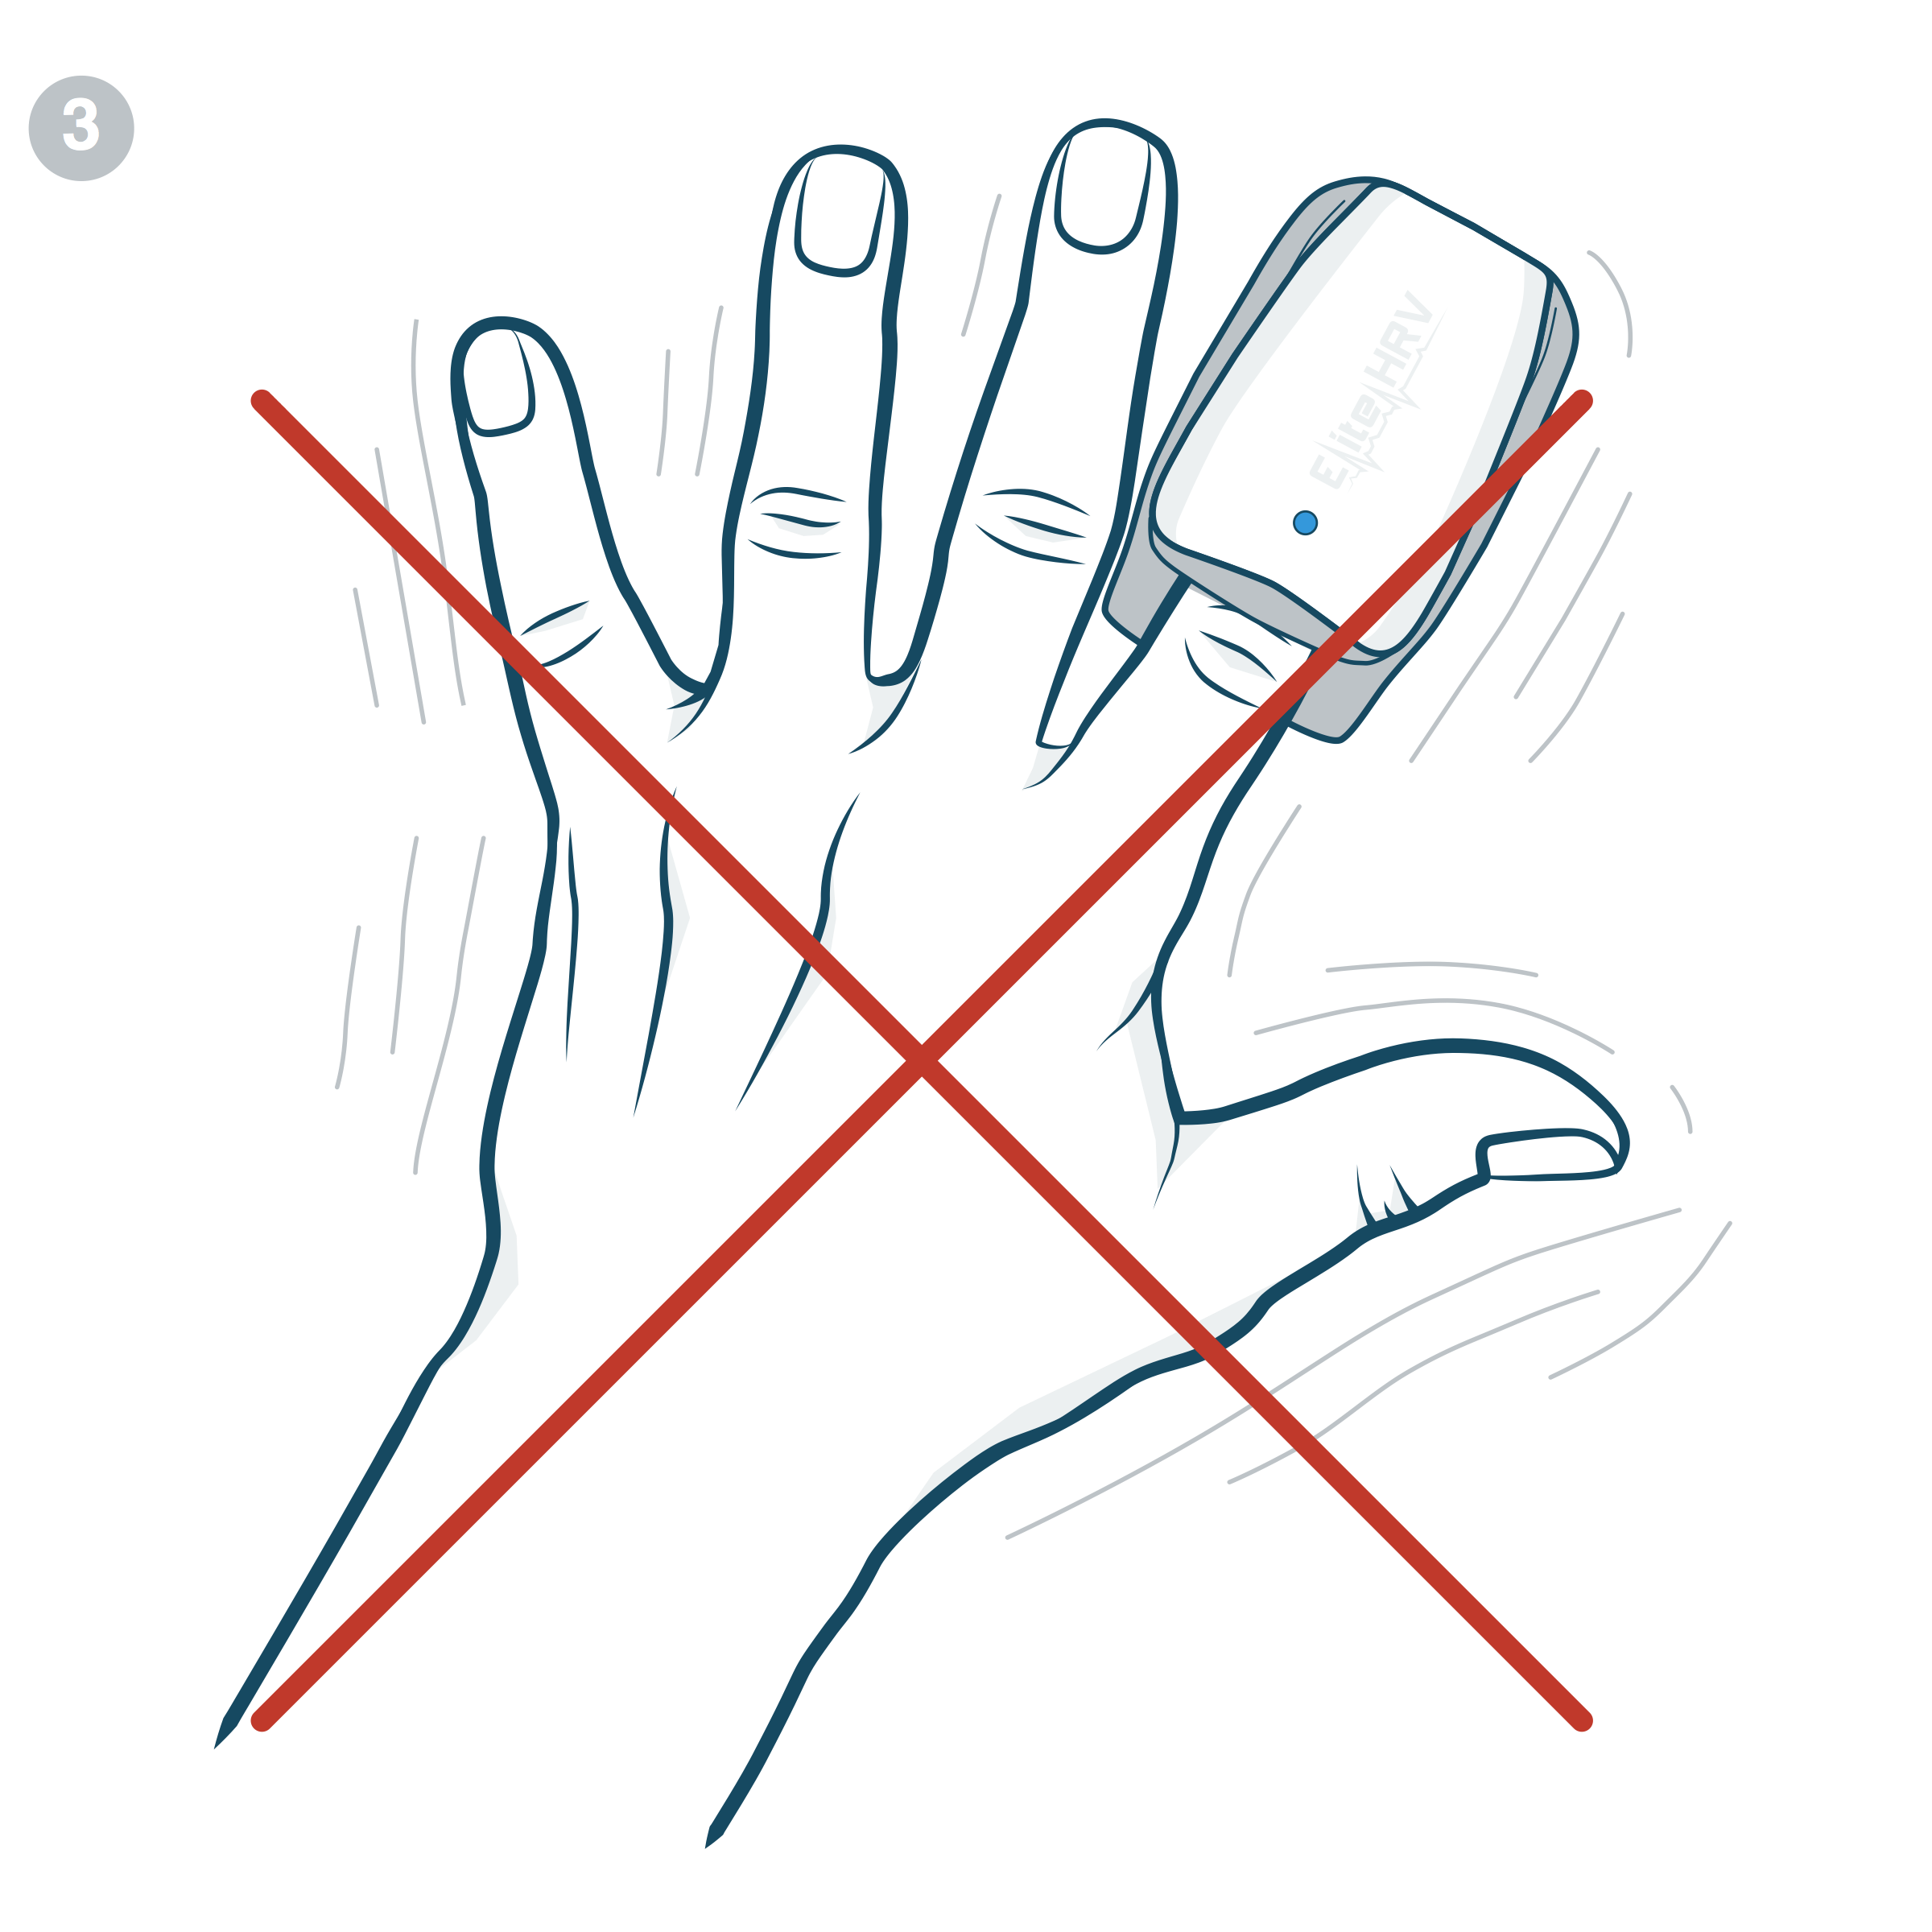
CorSense is designed for at rest measurements. When taking heart rate variability measurements, minimize hand and finger movement (image 3).

CorSense can be used on any finger. Optimal use will vary per person and finger depending on finger size, shape, and circulation strength. Do not pry CorSense open and do not insert objects larger than 3/4 inch in diameter.

Range

If CorSense and your receiving mobile device are separated by more than 10 meters (33 feet), they will disconnect.

Charging your CorSense

The CorSense rechargeable Lithium Ion battery is designed to hold a charge for an operating time of 4+ hours and standby time of 6+ months.

To charge, insert the Micro-B USB end of the provided charging cable into the CorSense charging port and plug the USB into your computer or alternate USB charging port (image 4).


Battery status and charging LED indicator

Low Battery Alert – Flashing red LED light when on

Charging – Solid red LED light

Fully Charged – Solid blue LED light

Note: CorSense uses sensitive motion detection to automatically power on the device and detect a pulse with no need for buttons. Because of this feature, if you travel with CorSense or frequently move it, it may require more frequent charging to maintain an operational battery.

Caring for your CorSense

CorSense requires very little maintenance. To clean your device, use dry or moist wipes to wipe the exterior plastic, rubber, and sensor windows. Do not clean your device with solvents or abrasives.

For best results:

  Use the original or certified USB cables

  Not waterproof – don’t expose to liquids

  Avoid dropping

  Don’t disassemble

  Avoid extreme temperatures

  Don’t put objects on top of or pry open


For FAQs and more information, please visit: elitehrv.com/support

Still have a question about your CorSense?    Contact Us

Important Product Information

This Important Product Information Guide contains safety and handling, regulatory, and warranty information.

If you have a pacemaker or other implanted electronic device, consult your physician before using a heart rate sensor. This product is intended for recreational use only and is not intended for medical purposes. Heart rate and other readings could be influenced by interference from external sources. This device contains no user serviceable parts and repairs. Any unauthorized modifications or repairs will void your warranty. Do not leave device exposed to excessive heat or cold.

Limited Warranty

Elite HRV warrants this product to be free from defects in material and workmanship, under normal use, for 90 days from the date of original purchase. Defects that have resulted from improper or unreasonable use or maintenance, accident, excess moisture, insects, improper packaging, lightning, power surges, or unauthorized tampering, alteration or modification are not covered.

IN NO EVENT SHALL ELITE HRV BE LIABLE FOR SPECIAL, INCIDENTAL, CONSEQUENTIAL OR INDIRECT DAMAGES. SOME PLACES DO NOT ALLOW LIMITATIONS ON THE EXCLUSION OF LIMITATION OF LIABILITY TO SPECIFIED AMOUNTS, SO THE ABOVE LIMITATIONS OR EXCLUSIONS MAY NOT APPLY TO YOU.

FCC Rules Part 15

The enclosed hardware device complies with part 15 or the FCC Rules. Operation is subject to the following two conditions: (1) This device may not cause harmful interference and (2) it must accept any interference received, including interference that may cause undesired operations.

FCC Compliance Statement

Changes or modifications not expressly approved by the party responsible for compliance could void the user’s authority to operate the equipment.

This device complies with Part 15 of the FCC Rules. Operation is subject to the following two conditions: (1) this device may not cause harmful interference, and (2) this device must accept any interference received, including interference that may cause undesired operation.

This equipment has been tested and found to comply with the limits for a Class B digital device, pursuant to Part 15 of the FCC Rules. These limits are designed to provide reasonable protection against harmful interference in a residential installation. This equipment generates, uses and can radiate radio frequency energy and, if not installed and used in accordance with the instructions, may cause harmful interference to radio communications. However, there is no guarantee that interference will not occur in a particular installation.

If this equipment does cause harmful interference to radio or television reception, which can be determined by turning the equipment off and on, the user is encouraged to try to correct the interference by one or more of the following measures:

  • Reorient or relocate the receiving antenna.
  • Increase the separation between the equipment and receiver.
  • Connect the equipment into an outlet on a circuit different from that to which the receiver is connected.
  • Consult the dealer or an experienced radio/TV technician for help.

California Proposition 65

The enclosed hardware and its packaging contain chemicals the State of California has found to cause cancer, birth defects or reproductive harm.

IC Statement

This device complies with Industry Canada licence-exempt RSS standard(s). Operation is subject to the following two conditions: (1) This device may not cause interference, and (2) This device must accept any interference, including interference that may cause undesired operation of the device.

Le présent appareil est conforme aux CNR d’Industrie Canada applicables aux appareils radio exempts de licence. L’exploitation est autorisée aux deux conditions suivantes: (1) L’appareil ne doit pas produire de brouillage, et (2) L’utilisateur de l’appareil doit accepter tout brouillage radioélectrique subi, même si le brouillage est susceptible d’en compromettre le fonctionnement.
This Class [B] digital apparatus complies with Canadian ICES-003.

Cet appareil numérique de la classe [B] est conforme à la norme

CE Statement

This device is compliant with Directives 1999/5/EC and 2011/65/EU. The relevant Declaration of Conformity is available at elitehrv.com/regulatory_information.

This product is compliant with Directives 2013/56/EC and 2012/19/EU. Separate disposal for battery and electronics.